I finished my final month's kit for Fresh Pages Co. Sigh. I will sooooo miss it.
I loved being on a design team! I got some great goodies, met some great people and got some serious scrapbooking done! I would love to do it all over again. I've been checking out other company's calls for design team members but have found nothing that really gets me as excited as Fresh Pages.
I think I'll start doing a lot more of the challenges I see posted at CKMB, TwoPeas and some of the challenge blogs I visit. And, I will definitely start making my own "kits" to scrapbook with. There is just something about having a finite number of choices that really gets my creative juices flowing.
What or where are your favorite challenges???
PS-Thank you all so much for all the love you guys have sent my way the last few days. I've really felt down and it helped so much to hear from you. Thank you!!! :D

Friday, March 28, 2008
Tuesday, March 25, 2008
Good-bye Uncle Joe
My Uncle Joe passed away today. Less than a month ago we found out that he had lung cancer. He will be cremated and his ashes will be spread on his property. We will be celebrating his life at a wake in June.
Tomorrow, take the time and hug someone you love.
{{{{hugs}}}}}
Erica
Tomorrow, take the time and hug someone you love.
{{{{hugs}}}}}
Erica
Wednesday, March 19, 2008
Corteo
It was wonderful. It was awesome. It was amazing!!!
I love, love, love Cirque Du Soleil and I so love and appreciate my wonderful Uncle Doug for taking us to see it. He bought us Tapis Rouge tickets, which is their version of VIP. So, we had our own private area to wait in, free food and drinks before the show and during intermission, our own bathrooms, and a goodie bag with a program and CD. (Yes, I made my little brother get a program even though he didn't want one so I could use it for scrappin'!) :D
Oh, and Uncle Doug took us all out to dinner at a really yummy Italian place near his house. I love me some Italian food!!! :D
There was juggling, there was acrobatics, there was everything under the sun you could imagine. Oh, it was just wonderful. There were trapeze artists with no trapeze, they swung on people!!! People!!! Amazing! There was a high wire act that blew my mind. First, she went across en pointe, then on a unicycle, then with like TEN hula hoops!!! Hello! I can't even do one...on the ground!!! Finally, she walked the tightrope up a 45 degree angle. It bordered on the impossible.
There was a little person couple that were probably in their 50's who did some amazing stuff. I mean they were so flexible and strong and amazing!!! I want to be able to climb stairs without it bothering my hip at 50 and they are balancing and holding their entire bodies up with just their necks!!! Fantastic!
Anyway, if you ever get the chance to go to any of the Cirque's, I highly, highly recommend it.
PS-You won't regret it.
PPS-Did I mention it was awesome?!!
PPPS-Thank you, thank you, thank you Uncle Doug!!! Love ya!!! :D
Sunday, March 16, 2008
One Sheet Mini Book Tutorial***
This tutorial is my favorite one sheet mini book. It was promised to my croppin’ buddies from CKMB-sorry it took so long, girls and I hope you had a blast Saturday!!! So, without further ado, here we go!!!
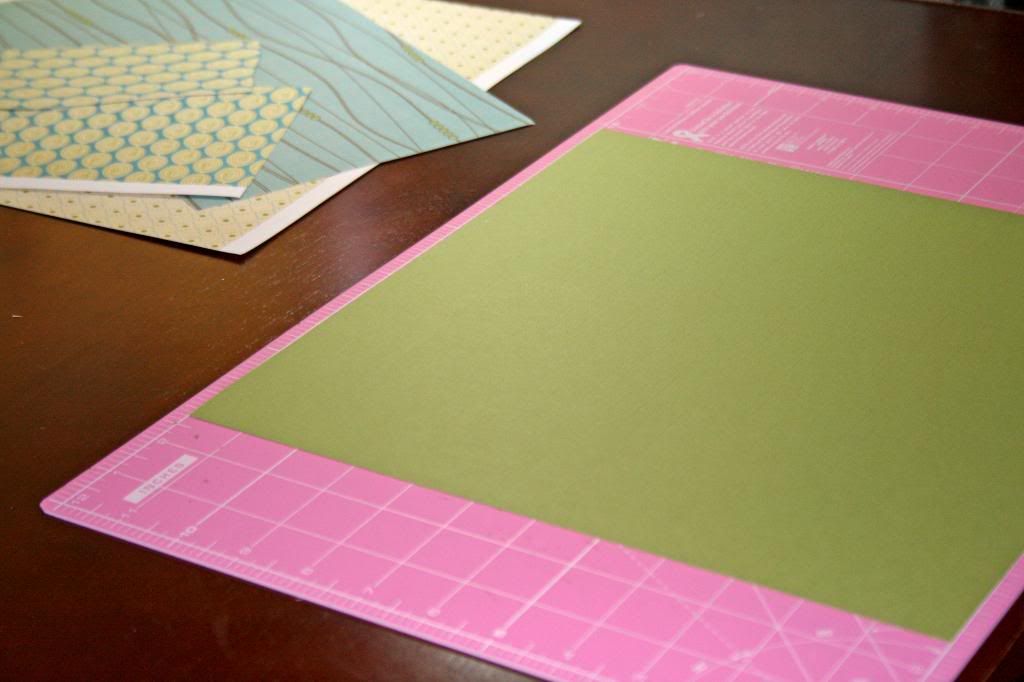
Goodies you’ll need:
~one sheet of 12”x12” cardstock (hence the name)
~scraps of patterned paper at least 3”x3”, you’ll need between 12-14
~ribbon, about 20”
Oh, and your scrapbooking arsenal (scissors, trimmer, exacto, adhesive, etc).

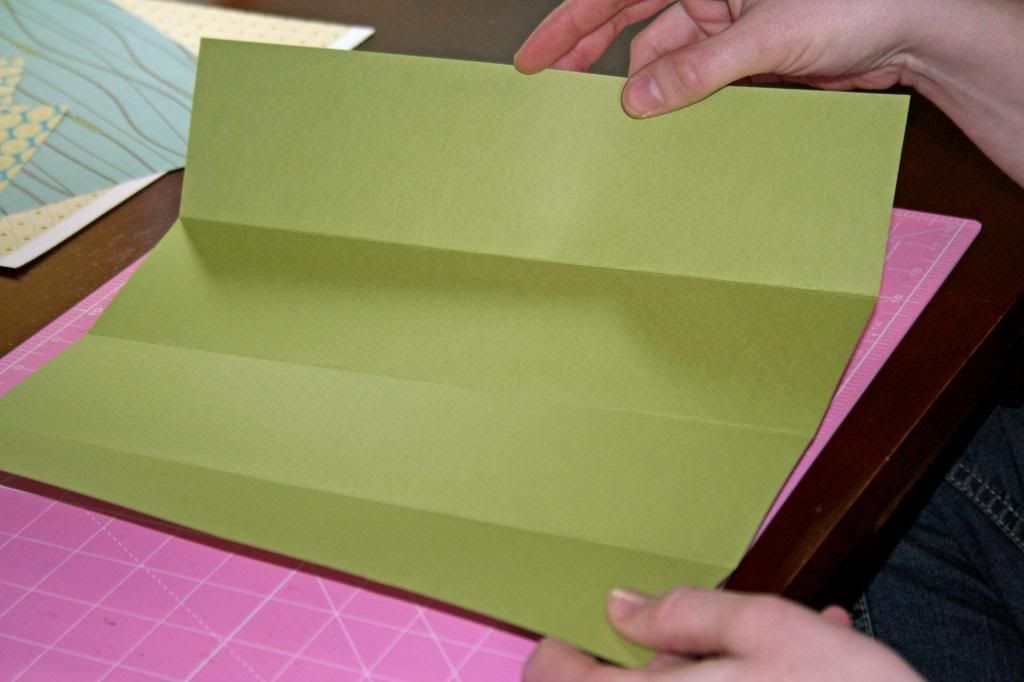
 We start with a lot of folding. Step one: Fold your cardstock in half. Then, unfold.
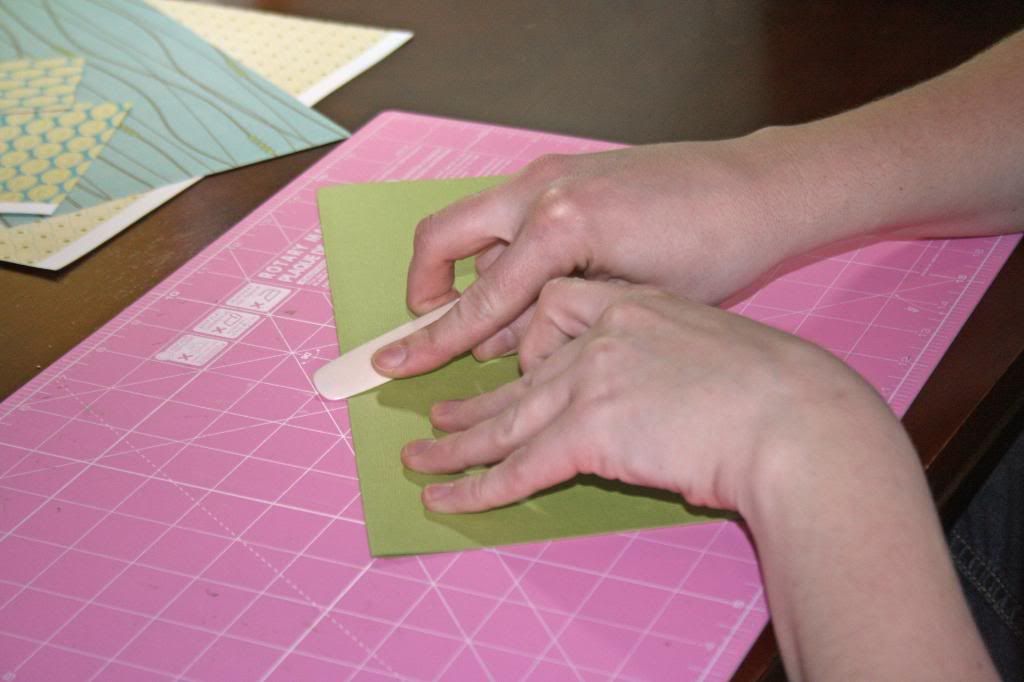
 Step two: Fold the edge of the cardstock into the middle. Repeat with the other side. Then, unfold.
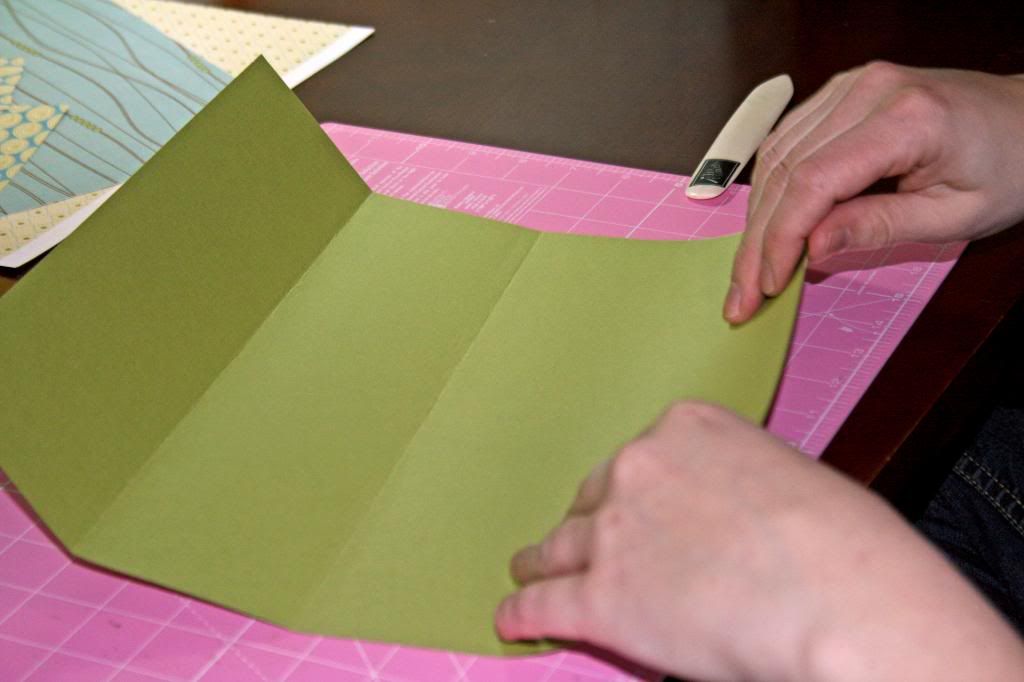
 Turn your cardstock 90 degrees and repeat steps one and two.
 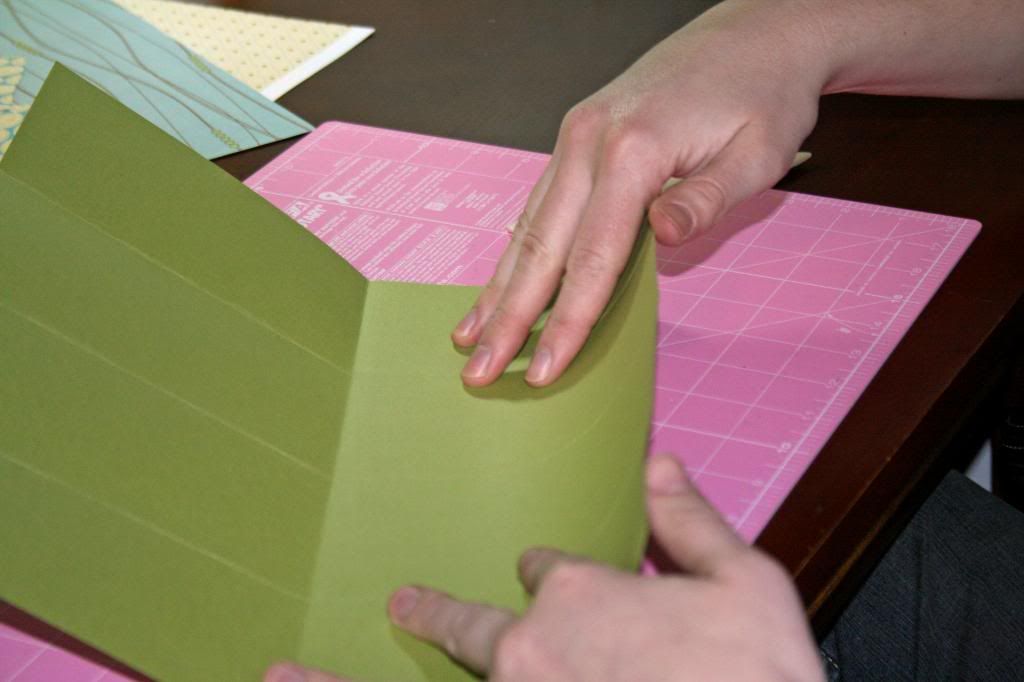 When you're done, you should have created a grid on your cardstock, like this.
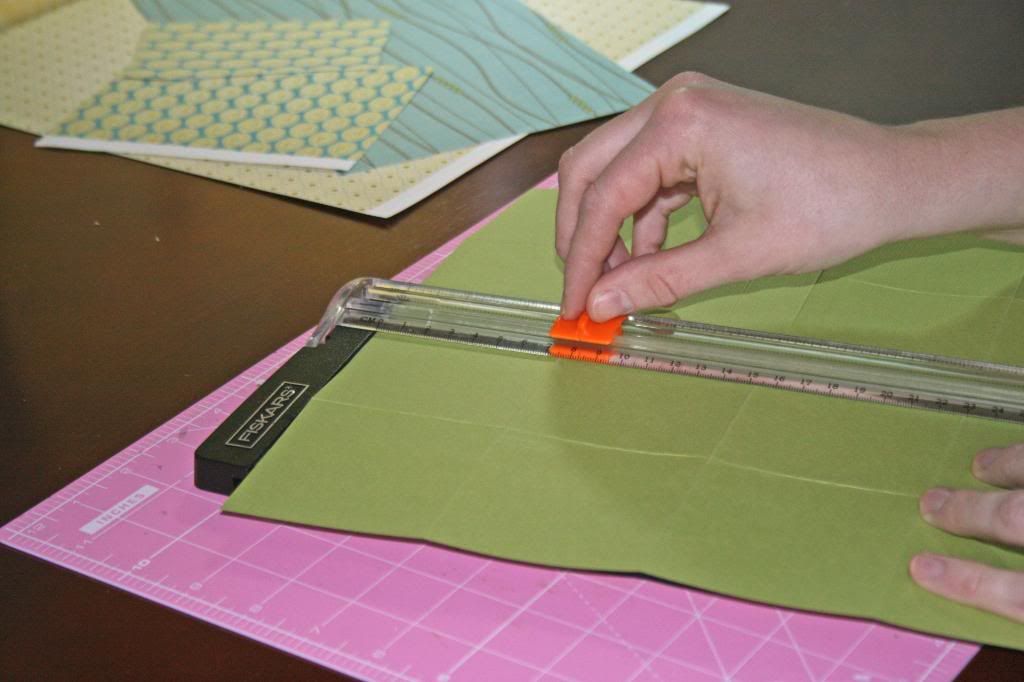
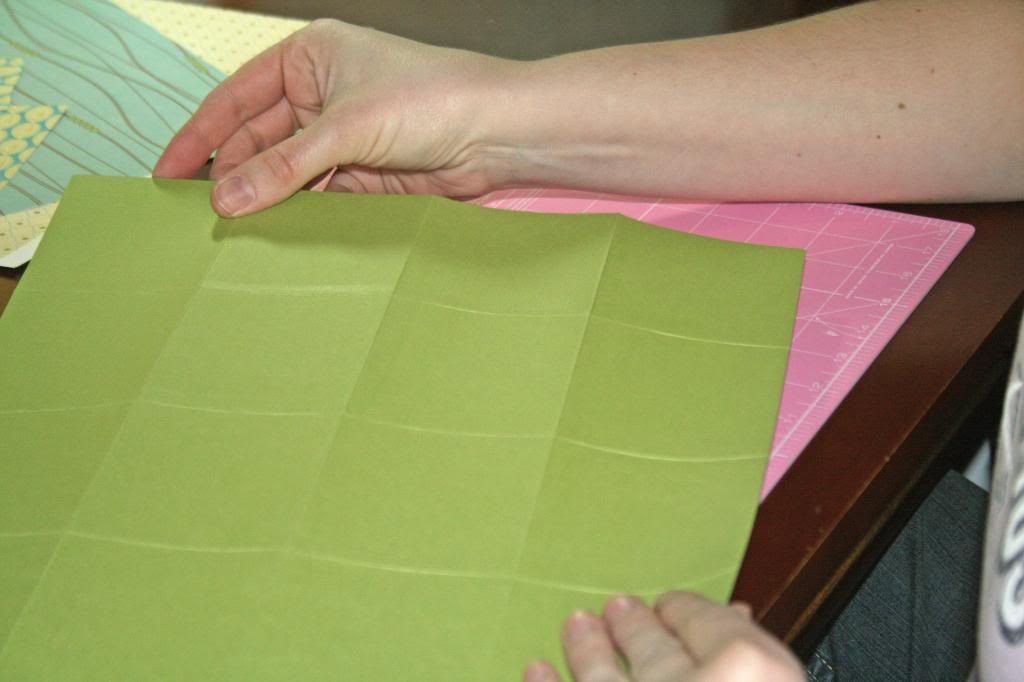 If you’re not a huge fan of folding, or you have a bunch of these to make, you can use the scoring blade on your trimmer or a ruler and your bone folder. Just score at 3”, 6” and 9”. Rotate, and score at 3,6 and 9 again.
 Now, we’ll do some cutting and a little more folding. Stay with me.
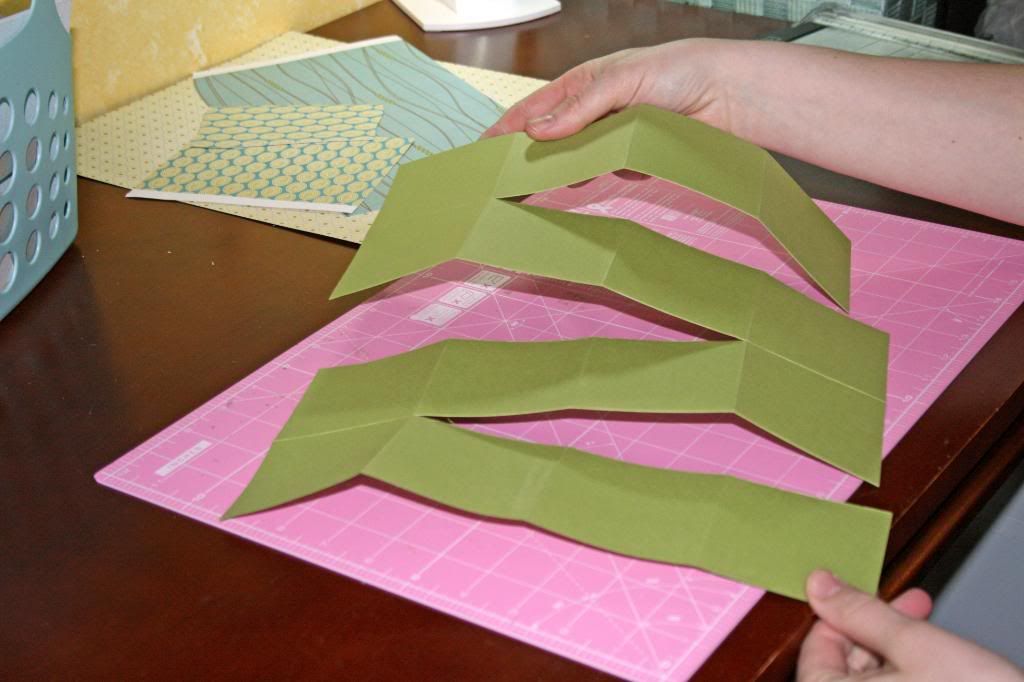
We’re going to used the grid lines as a guide for our cutting. Start at the bottom and cut the middle fold three-quarters of the way towards the top. Since we’ve got all those other handy-dandy perpendicular folds it’s easy to do without measuring. Simply start at one end, go through two folds and stop at the third.
 Now, it gets a little tricky. Starting at the top cut one of the two folds that parallels the one you just cut and cut it three-quarters of the way down. Then, do the same to the fold on the other side of the center cut.
Now, it gets a little tricky. Starting at the top cut one of the two folds that parallels the one you just cut and cut it three-quarters of the way down. Then, do the same to the fold on the other side of the center cut. It should look like this.
 If it doesn’t, don’t tell anyone and start over. I promise, I won’t say a word. :D
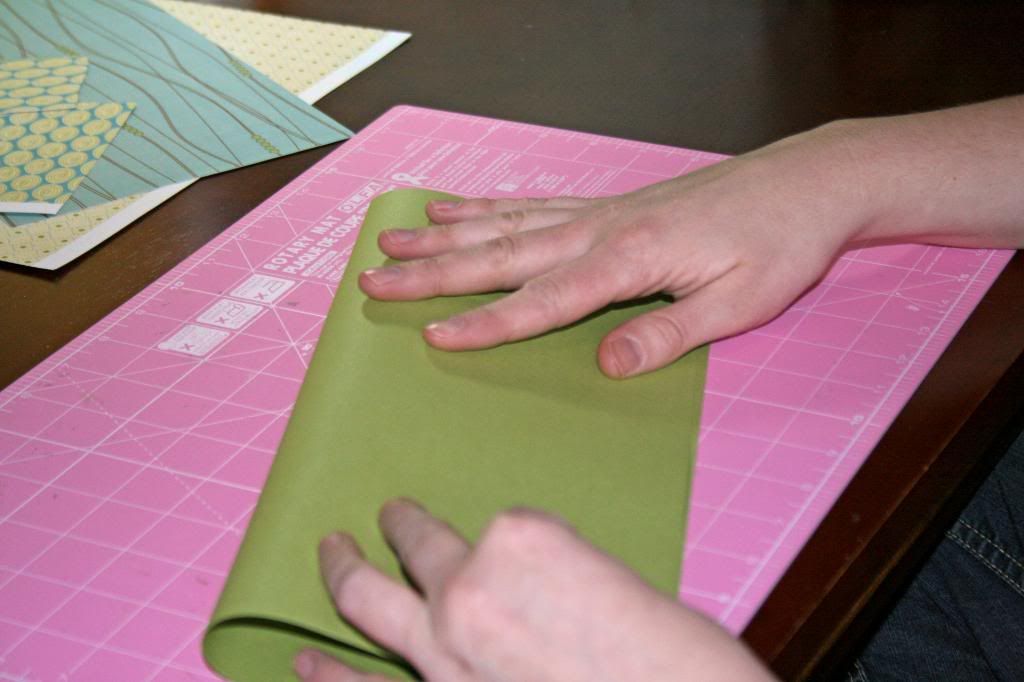
Now it's time for a little more folding. Starting at one end, fold one square onto the next. If you have textured cardstock, the texture should be on the inside for the first fold.
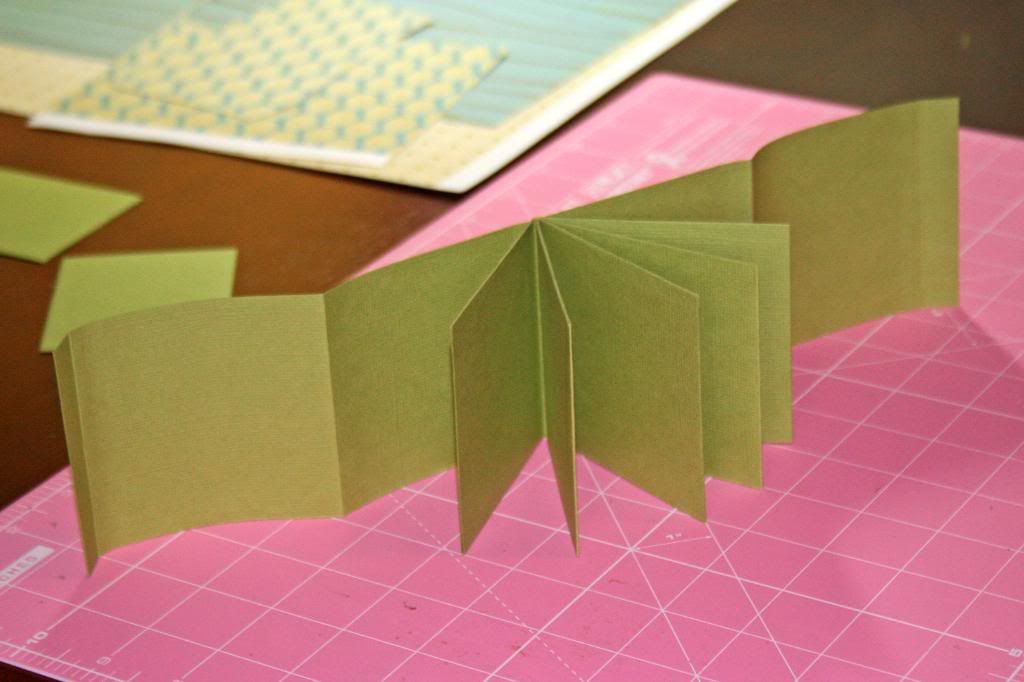
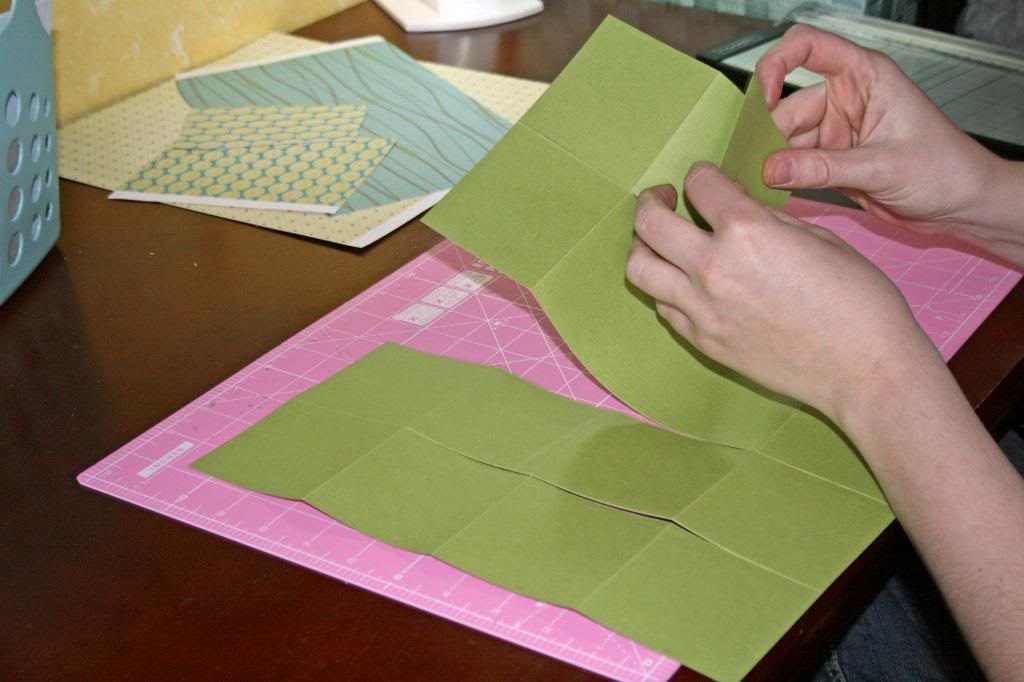 Then, keep on folding accordion style on every score line.
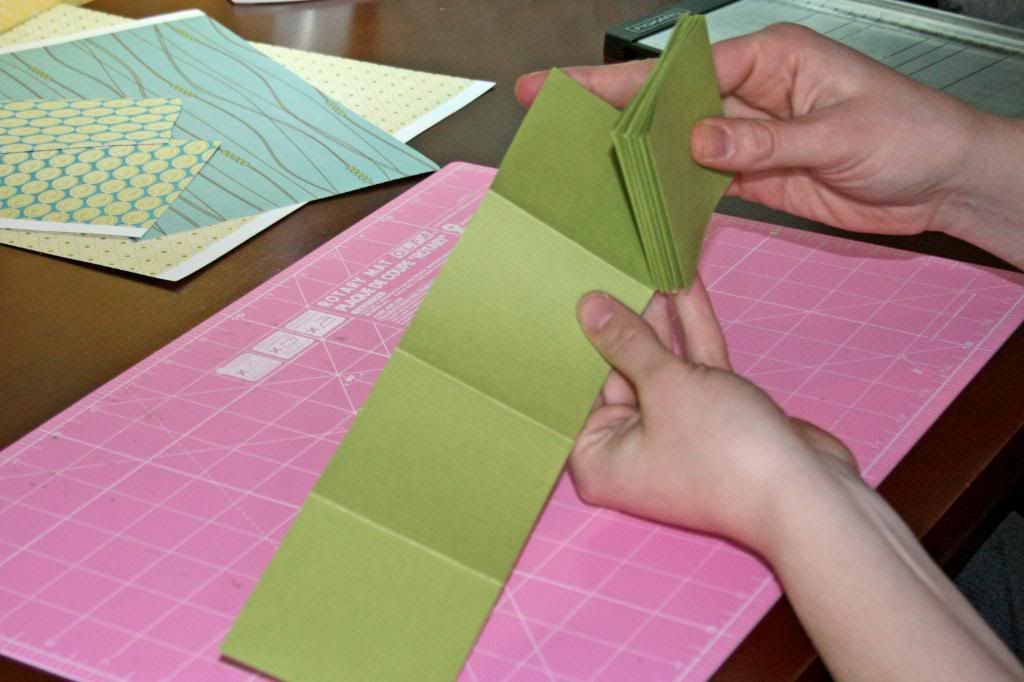 When you are done, it should look like this.
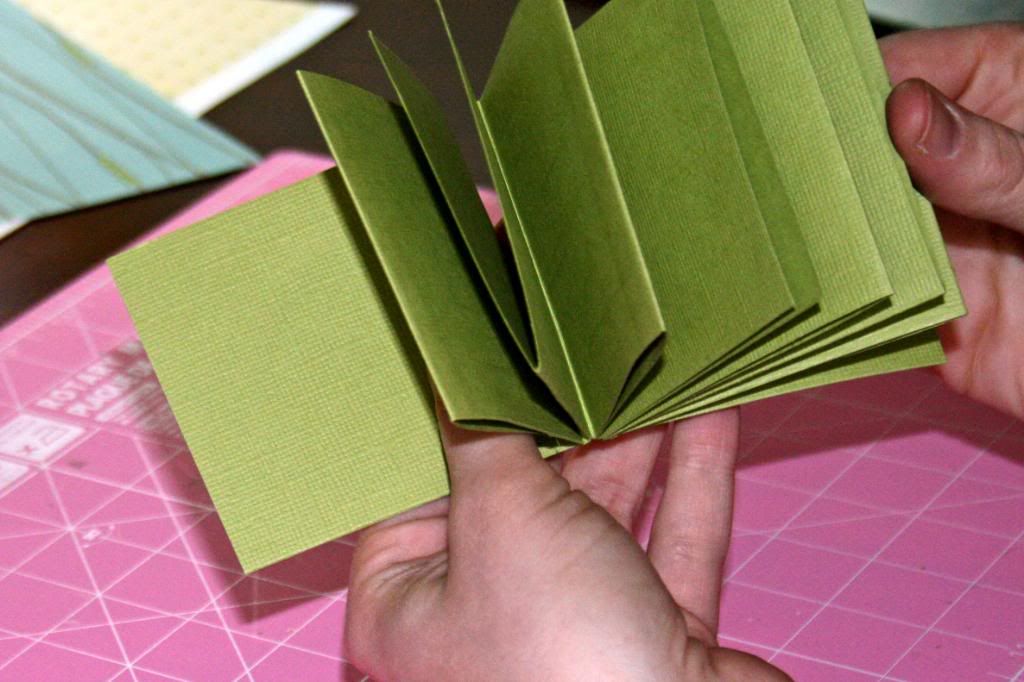 Unfold the first and last squares and cut all but 1/2" off of them. They will end up being the spine of your book.
Now dig out your adhesive (every time I hear or say this word I hear Robin Williams saying it in Mrs. Doubtfire, can't get it out of my head), I used a tape runner for this part.
Do not glue the first two squares together (like I did) or you will end up having to gently pry them apart (like I did). Starting with squares number 3 and 4, glue the insides (non-textured sides) together. Or, if you are using non-textured cardstock, glue 3 & 4, 5 & 6, 7 & 8, and so on. You will want to leave the last two squares unglued as well.
Tip~we are not counting the 1/2" ends as squares. :D
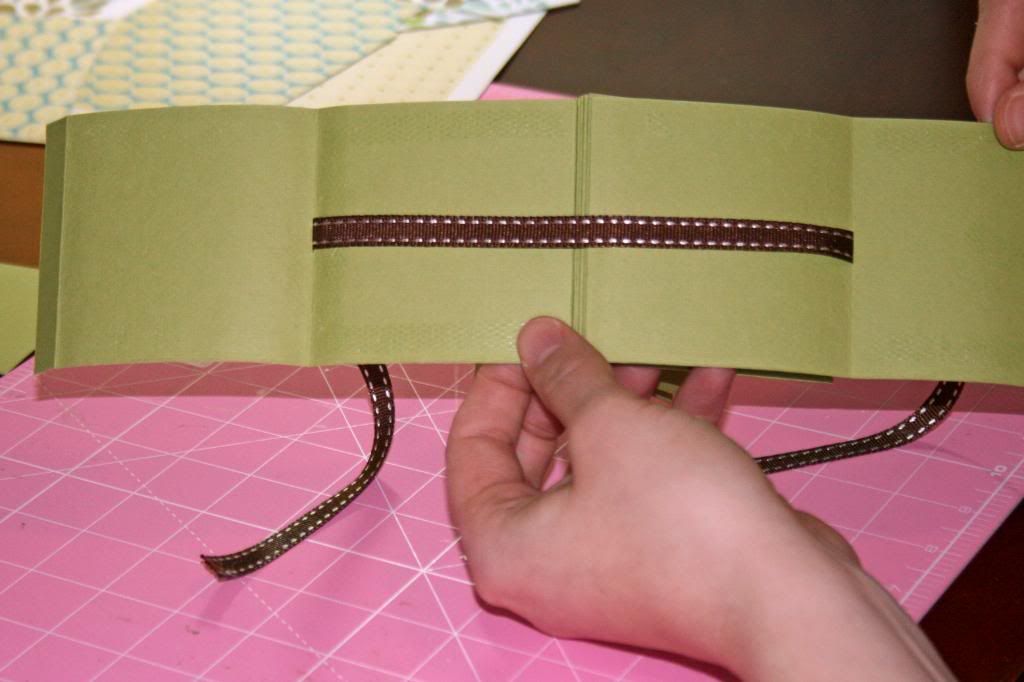
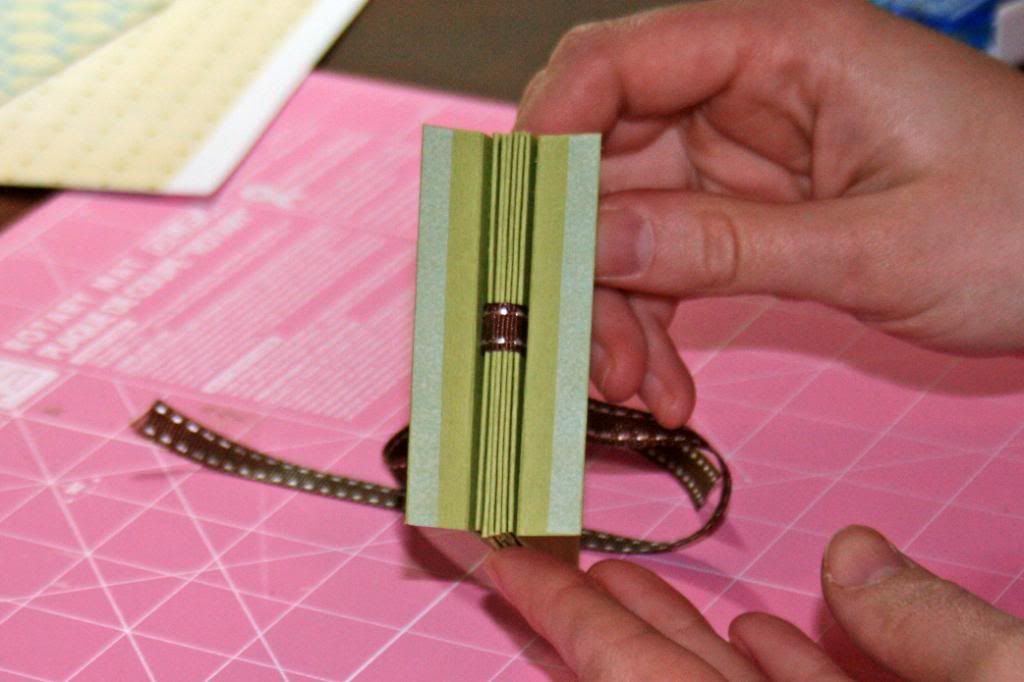
 Now dig out that ribbon. I try to use a ribbon that is the same on both sides for this since we will be using it to close the book. Measure your ribbon and then cut a slit in the middle of the score line between the 1/2" piece and the first square. Do the same on the other end of the book.
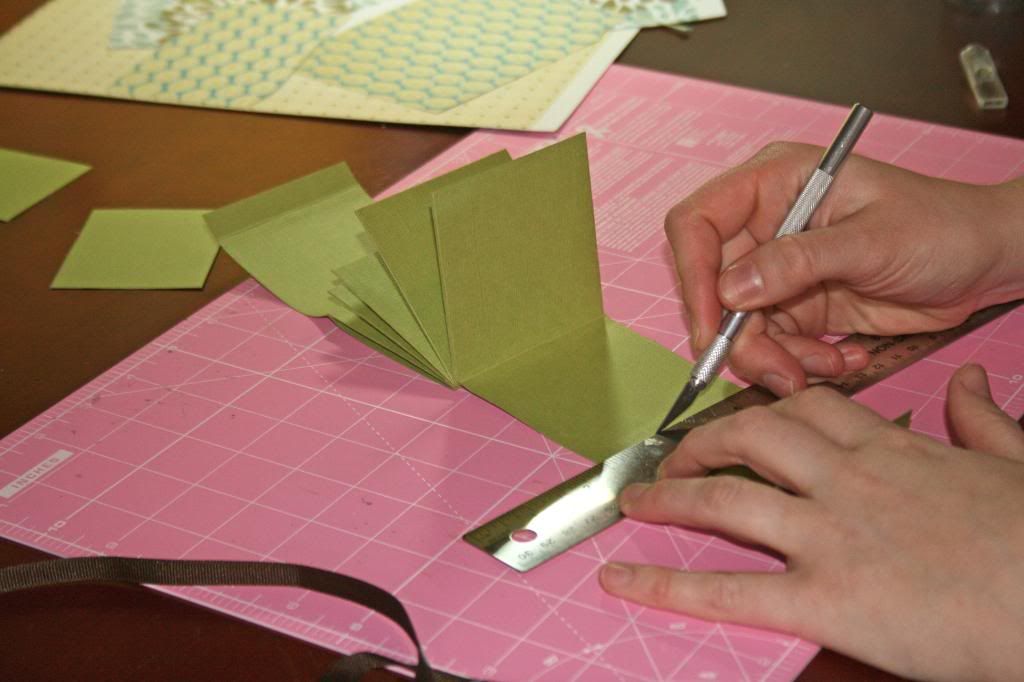 Thread the ribbon through the openings on both sides.
It should look like this.
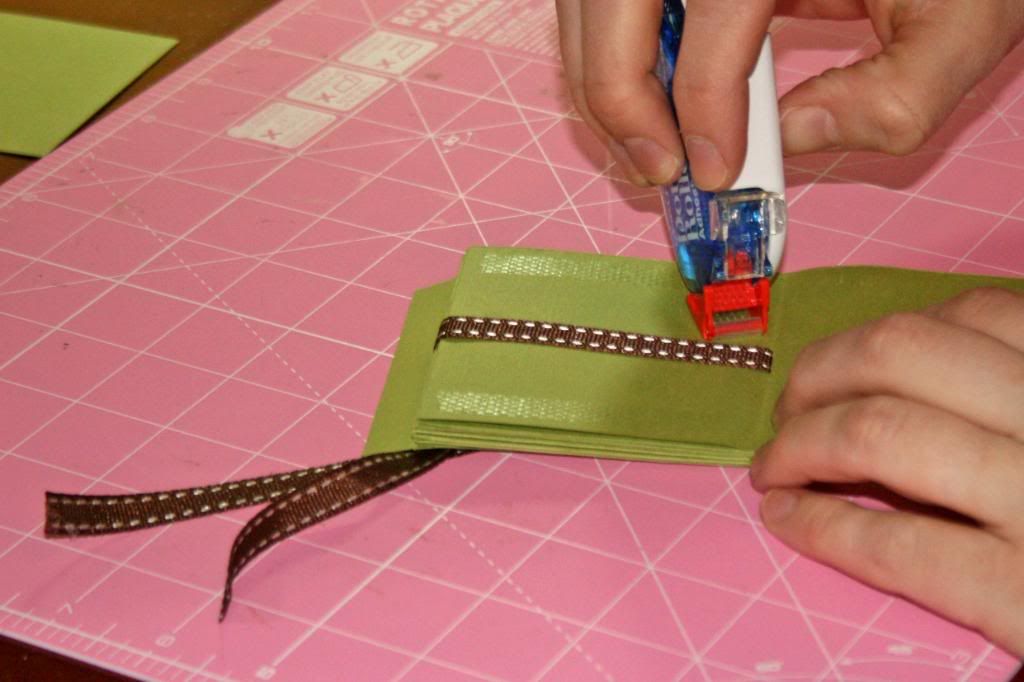
Get the ribbon lying all flat and nice and then glue pages 1 & 2 together and do the same on the other side.
 Almost there.
Cover the insides of both 1/2" flaps with adhesive. I used double-sided tape on mine so that I could trim the flaps without getting adhesive on my scissors.
 You'll want to decide now which side will be the front and which side will be the back. Fold the back cover strip over the spine and trim off the excess. You want it to be just a little shorter then the width of your book so that the front flap can fold over it. Now for the front flap. Peel off the protective strip of the tape and then fold the flap over the spine.
 Trim off the excess, I used an Exacto knife for this. 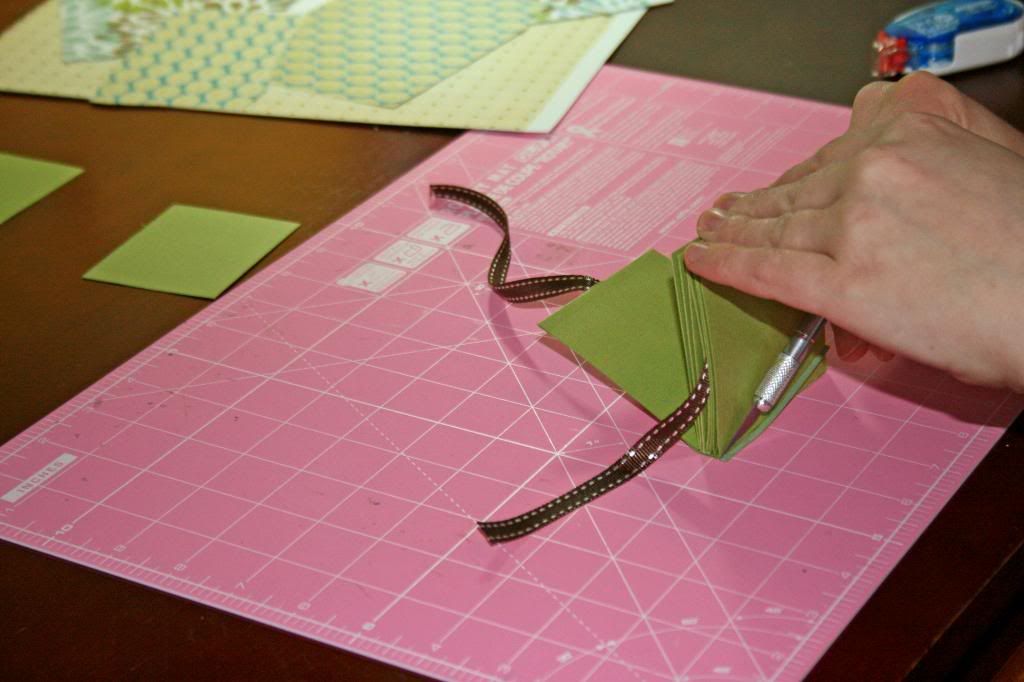 Almost done.
Almost done. Now, take your patterned paper scraps and cut them down to 2 3/4" squares. I rounded the corners of mine.
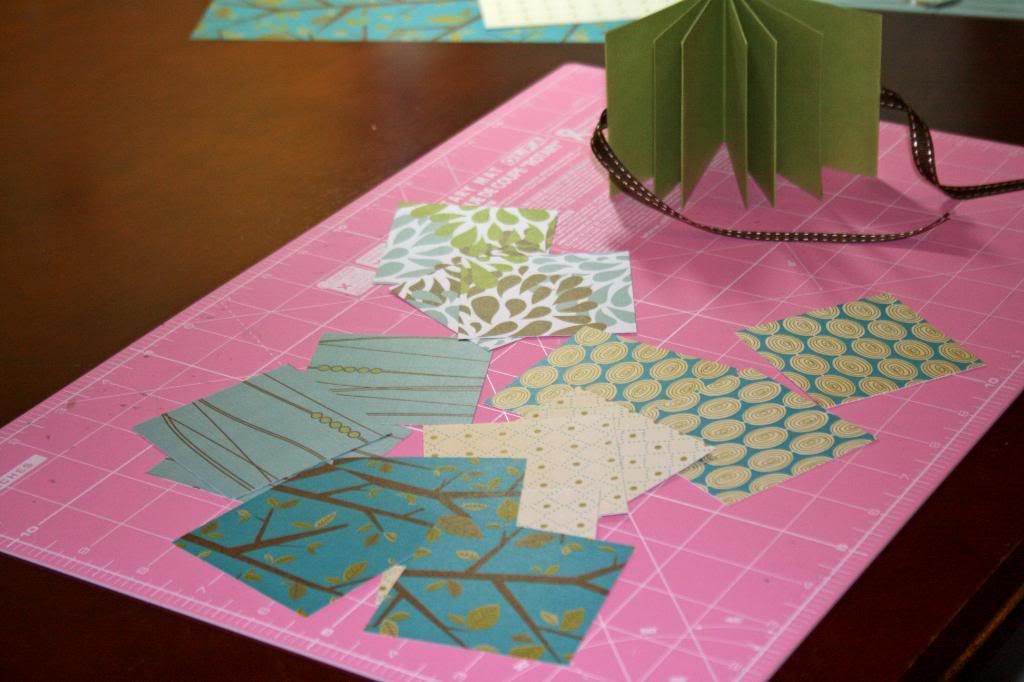 Glue those bad boys down to the pages of your book and you are done! Your book is ready for you to personalize and make your own!
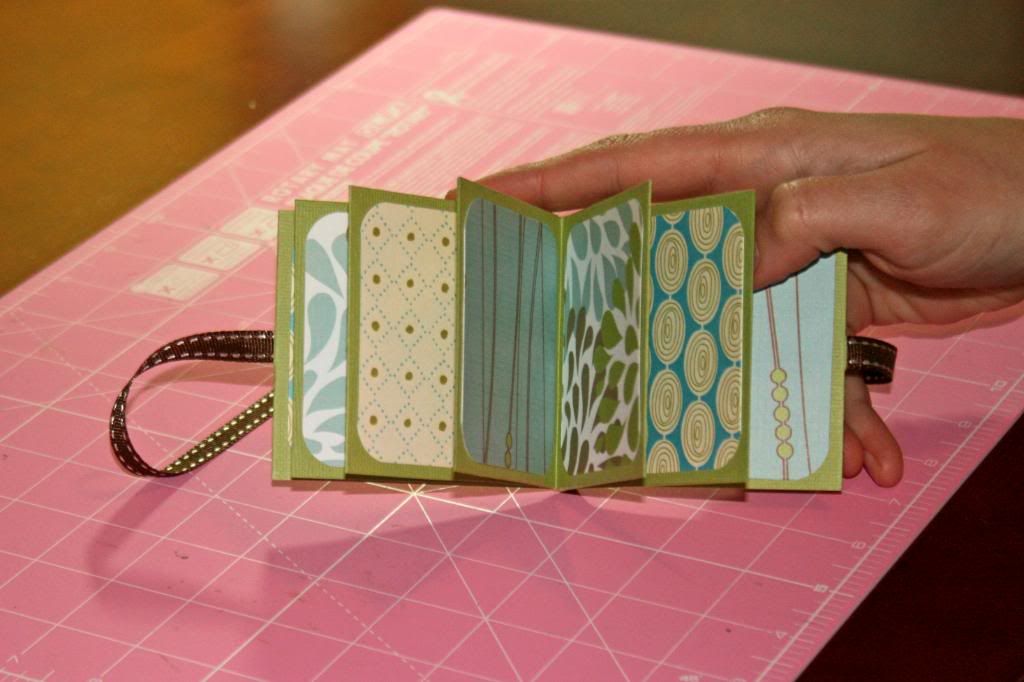 Here are a couple that I've made.
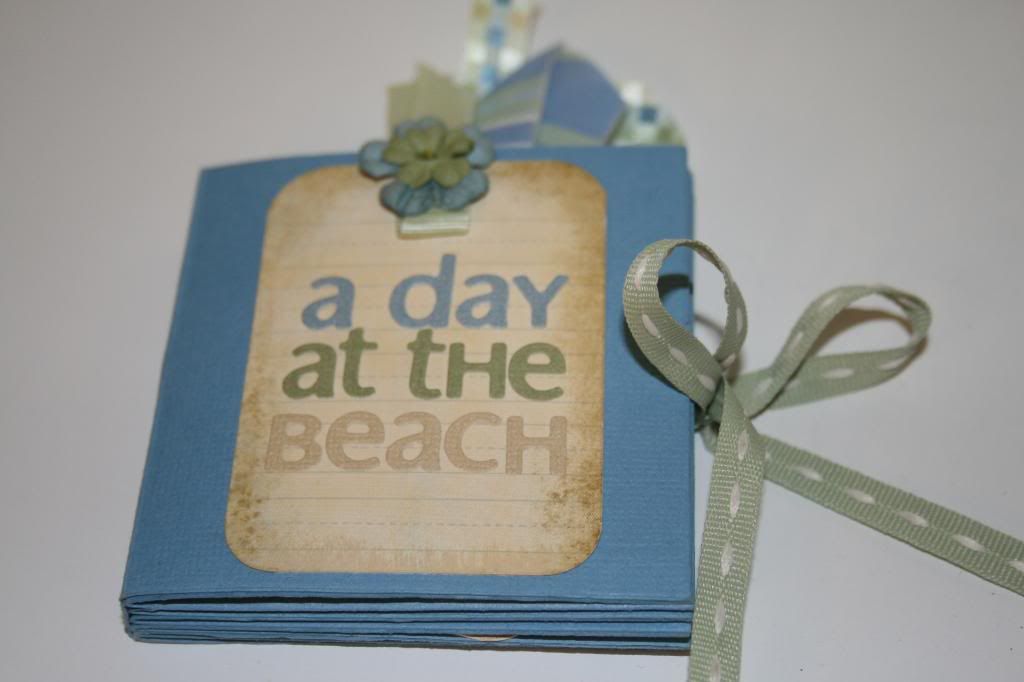
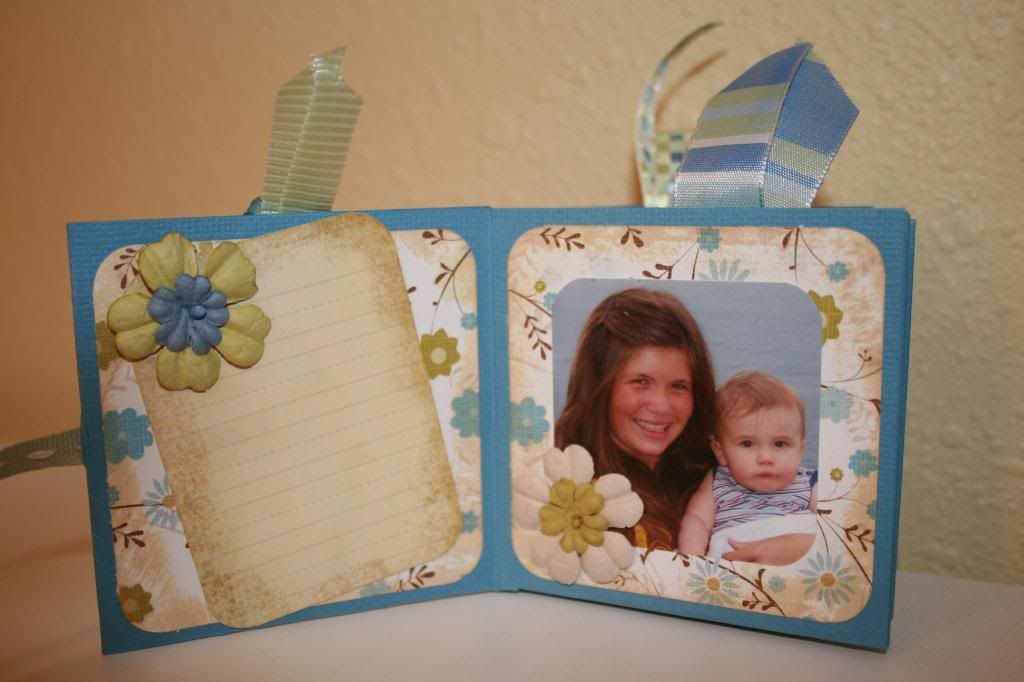
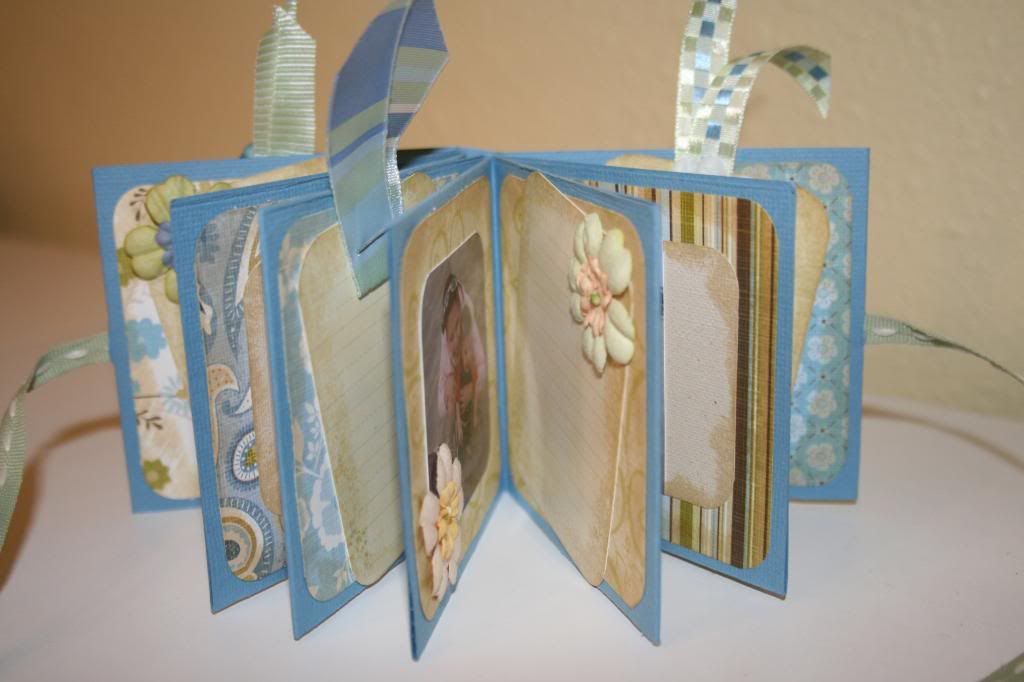


Have fun!!! Show me your book when you are done! Can't wait to see it! :D
Glue those bad boys down to the pages of your book and you are done! Your book is ready for you to personalize and make your own! Here are a couple that I've made.

Have fun!!! Show me your book when you are done! Can't wait to see it! :D
***Sorry this is a day late. They are installing fiber optic something or other in Canby and our cable and internet went out Sunday morning. The upside of being without distractions for a day is that Andrew and I have decided to not watch TV or internet surf when we are both home. We've both been feeling a little ignored. We had a very nice night last night just talking and doing house stuff.
But, don't worry, I can still visit when he's at work! ;)
Saturday, March 15, 2008
Amazing!
Tonight, I'm going with my brother, my uncle and his friends to see this.
 It's gonna be amazing, AMAZING I tell you!!!
Tomorrow, I'm going to post a tutorial on how to make this.

 It's gonna be amazing, AMAZING I tell you!!!
 Tomorrow, I'm going to post a tutorial on how to make this.

It's gonna be amazing, AMAZING I tell you!!!
:D
Tuesday, March 11, 2008
Honeymoon in a Basket
Andrew and I were invited to a wedding this last weekend. Well, Booger and I ended up staying at home while Andrew went for us and delivered the gift.
Now, this wedding is for a very young couple who cannot afford and will not be taking a honeymoon at this particular point in time. So, I figured, a honeymoon in a basket is just the ticket! :D
I actually came up with this idea while on the elliptical trainer at the gym. I was reading my brand-spankin' new copy of 101 Hip, Handmade Gifts. Said magazine was my "payment" for having the story of how Andrew and I met (it involved flying peanuts) published in the February issue of Creating Keepsakes. Anywho, I was reading and sweating and getting inspired. I wanted to decorate a bunch of cute goodies and put them in an equally cute basket.
Once I was home and showered and Booger was in bed, I called Andrew and had him do a little reconnaissance(holy-moly, I spelled that correctly!!) for me. He found out that the bride's colors were going to be black and white, they were not going on a honeymoon and alcohol should probably not be included as bride was just a teensy bit pregnant and groom was not quite old enough to legally imbibe.
This was the end result! Sparkling apple cider, two wine glasses, some chocolates, candles, matches and various and assorted bath products. (Andrew suggested condoms. Yes, my hubby is a bit of a smart-aleck.)
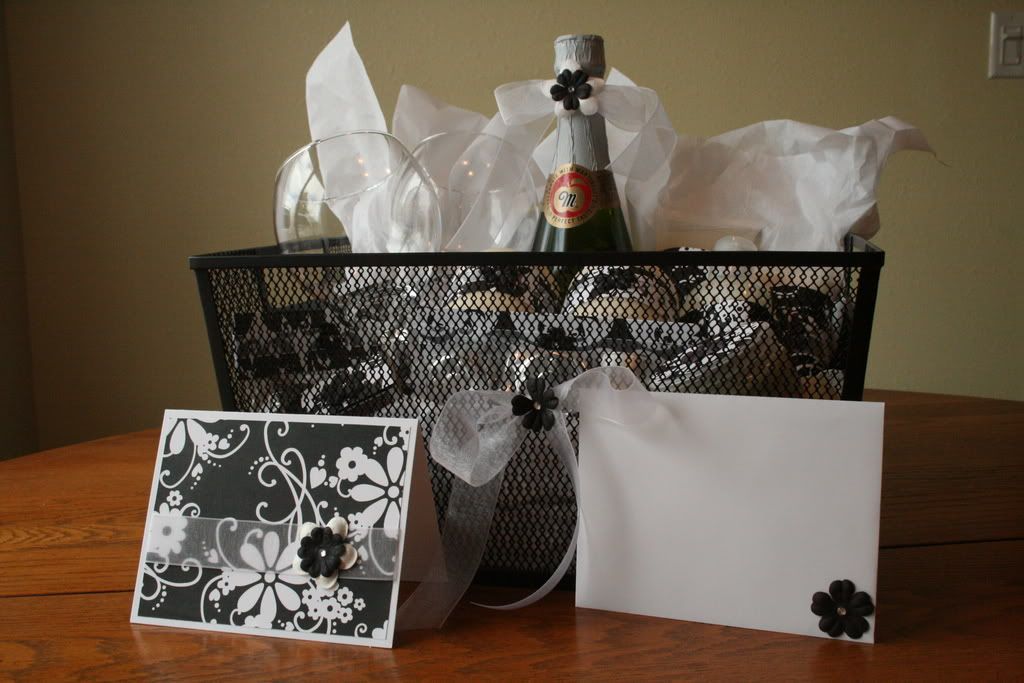
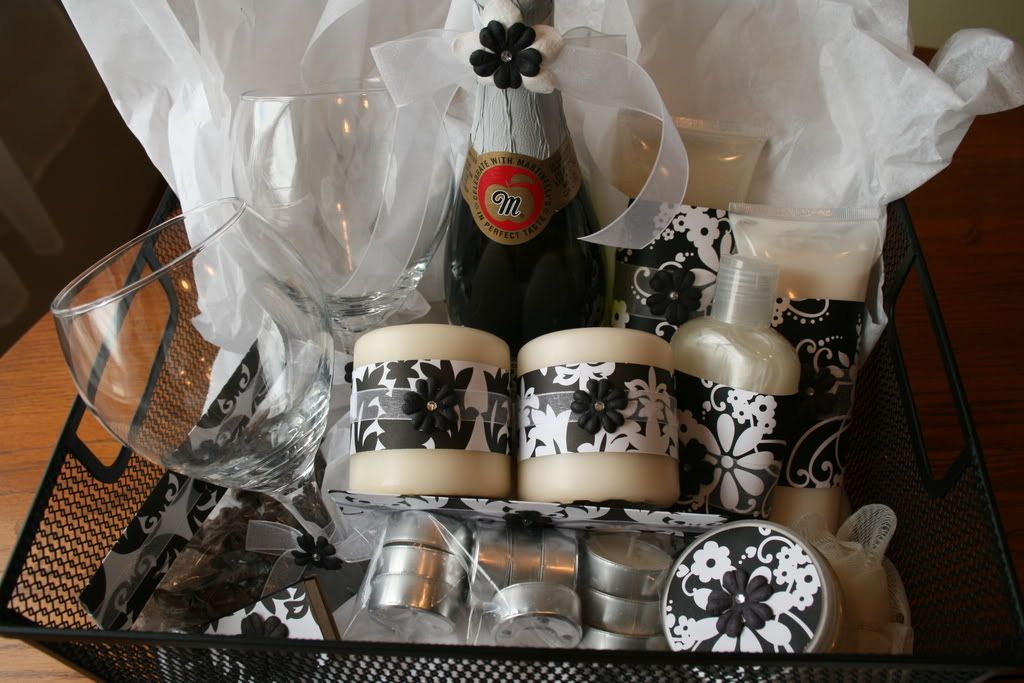

The floral black and white paper is Doodlebug and the other black and white paper is Tinkering Ink. I totally lucked out when making this because the top of the container that contains bath salts is the same size as one of my circle punches!!!
Now, this wedding is for a very young couple who cannot afford and will not be taking a honeymoon at this particular point in time. So, I figured, a honeymoon in a basket is just the ticket! :D
I actually came up with this idea while on the elliptical trainer at the gym. I was reading my brand-spankin' new copy of 101 Hip, Handmade Gifts. Said magazine was my "payment" for having the story of how Andrew and I met (it involved flying peanuts) published in the February issue of Creating Keepsakes. Anywho, I was reading and sweating and getting inspired. I wanted to decorate a bunch of cute goodies and put them in an equally cute basket.
Once I was home and showered and Booger was in bed, I called Andrew and had him do a little reconnaissance(holy-moly, I spelled that correctly!!) for me. He found out that the bride's colors were going to be black and white, they were not going on a honeymoon and alcohol should probably not be included as bride was just a teensy bit pregnant and groom was not quite old enough to legally imbibe.
This was the end result! Sparkling apple cider, two wine glasses, some chocolates, candles, matches and various and assorted bath products. (Andrew suggested condoms. Yes, my hubby is a bit of a smart-aleck.)
The floral black and white paper is Doodlebug and the other black and white paper is Tinkering Ink. I totally lucked out when making this because the top of the container that contains bath salts is the same size as one of my circle punches!!!
I really hoped they liked it! :D
Monday, March 10, 2008
What I've been doing lately...
OK, I've been working on my scrap room lately and I just have to ask you this...
How do you purge ribbon????
I can purge patterned paper, cardstock, stamps, tools, all sorts of things. But, I'm having a hard time purging ribbon.
Help a sister out!!! :D
Oh, and I made a cute "Honeymoon in a Basket" for a wedding Andrew went to this weekend. I'll post pictures tomorrow. ;D
How do you purge ribbon????
I can purge patterned paper, cardstock, stamps, tools, all sorts of things. But, I'm having a hard time purging ribbon.
Help a sister out!!! :D
Oh, and I made a cute "Honeymoon in a Basket" for a wedding Andrew went to this weekend. I'll post pictures tomorrow. ;D
Tuesday, March 4, 2008
Sunday, March 2, 2008
March Fresh Pages Kit!!!
The Fresh Pages Co kits for March are up here! I was sent the Bold Spectrum kit. Super yummy!
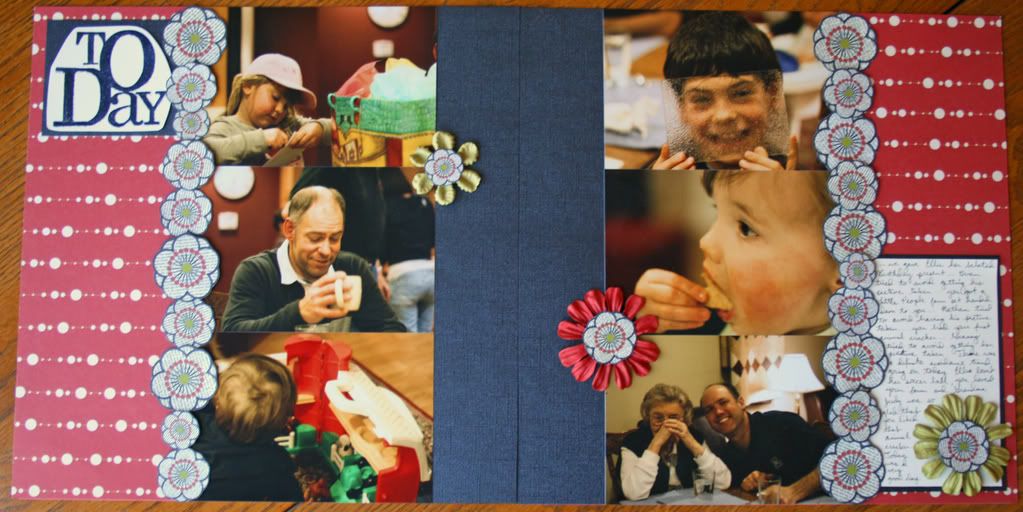 This first layout is just a random Sunday night dinner at my mom's house. We go there about twice a month. I cut out the flowers from another sheet included in the kit and used them as a border for the strips of photos.
 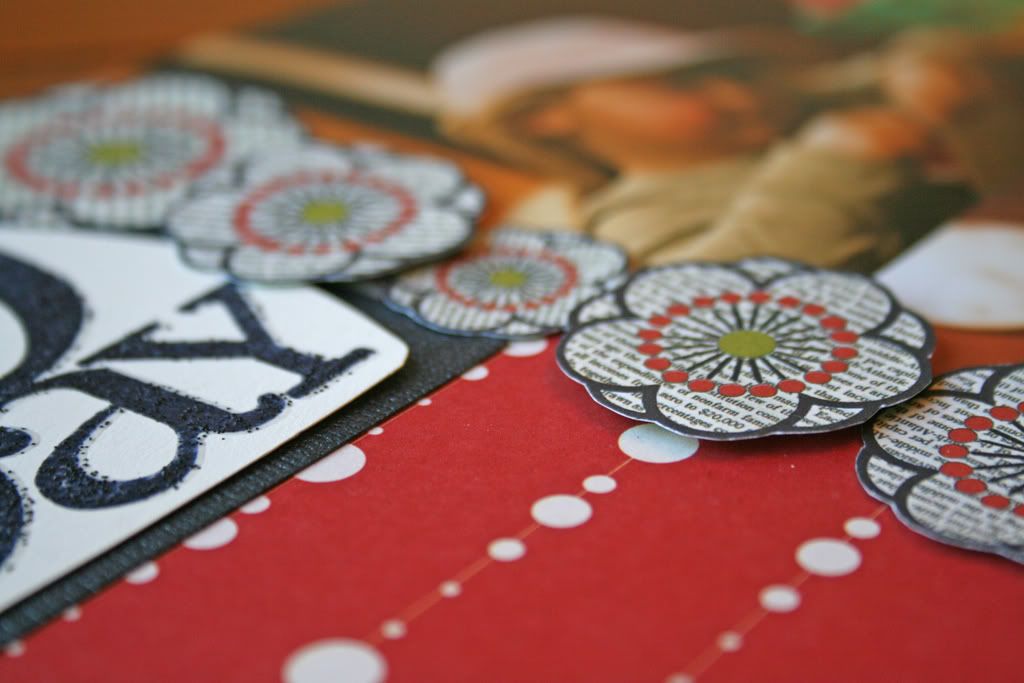 I layered the flowers and used pop dots under some of them for additional dimention. I used the Heidi Swapp Today stamp that came with the kit as the title. I stamped it with Stampin' Up! Basic Black and then again with Versamark and then embossed with clear embossing powder mixed with black glitter. I wanted a little shimmer to go with the black Bazzill Bling cardstock.
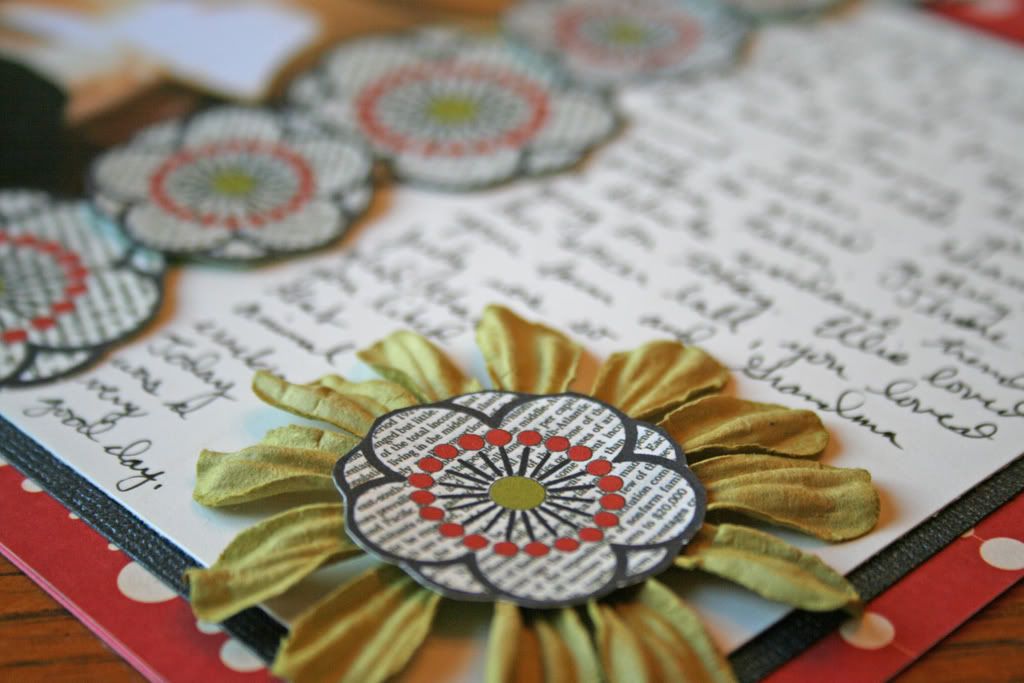 Then I used some of the leftover cut out flowers as centers for the Primas. The Prima's are layed out to draw your eye from the title through the layout to the journaling. (At least, that was the plan. LOL!)
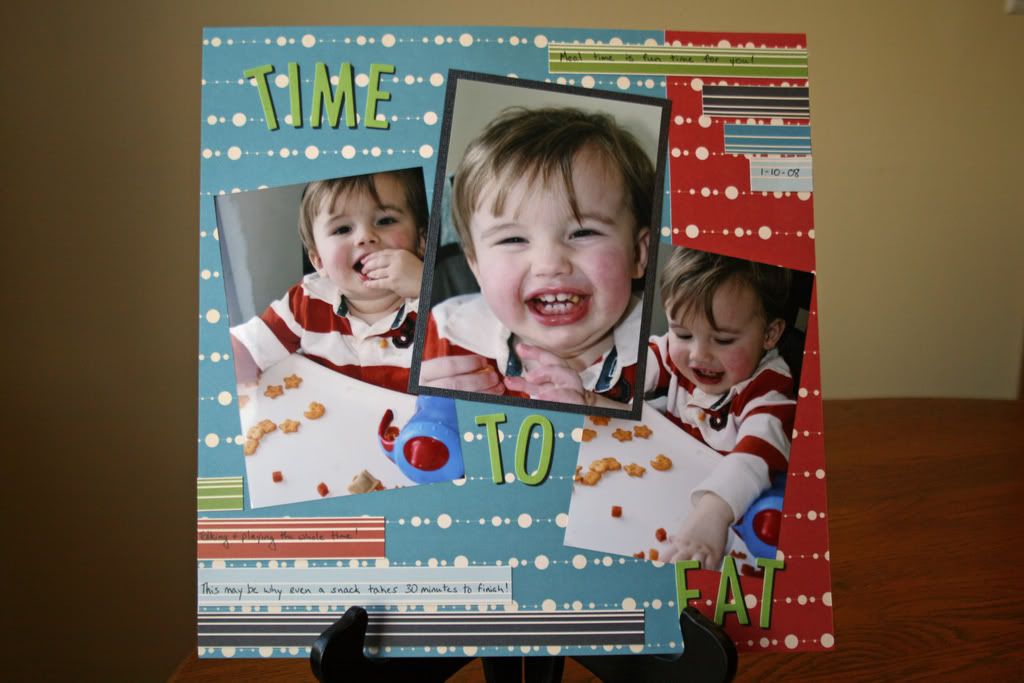 I'm so happy with the way "Time to Eat" turned out. It's so like a cartoon or a comic strip. It just makes me smile to see it.
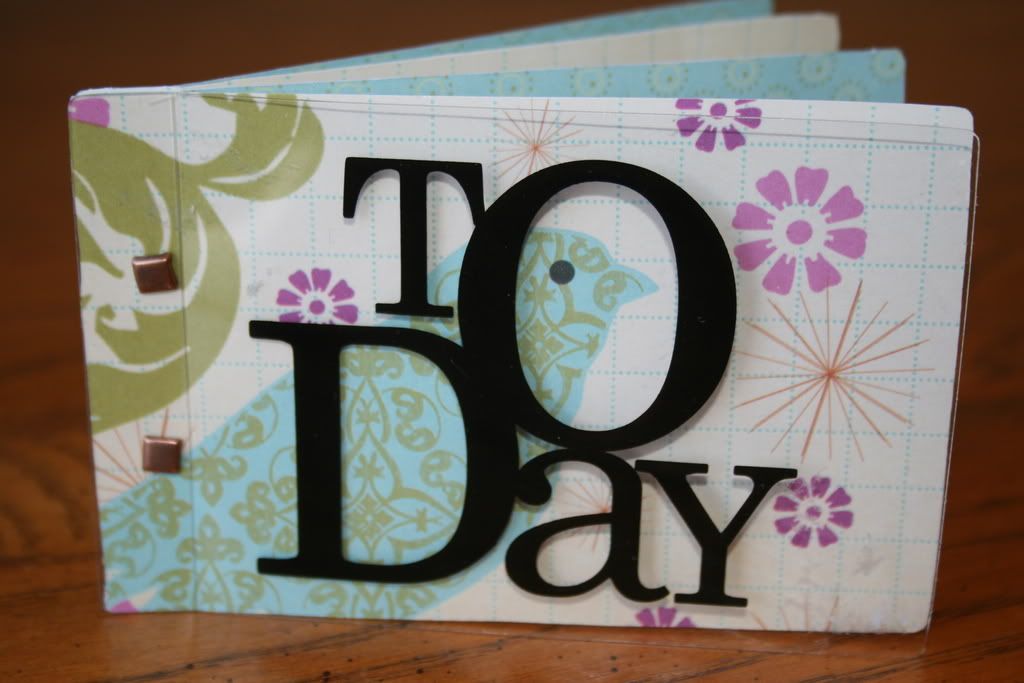 This little mini book uses the backing for the Heidi Swapp stamp as my cover. It's empty right now but the plan is to put my CKC-Portland pictures in it. The pretty colors will go so well with the rest of the Prima flowers.
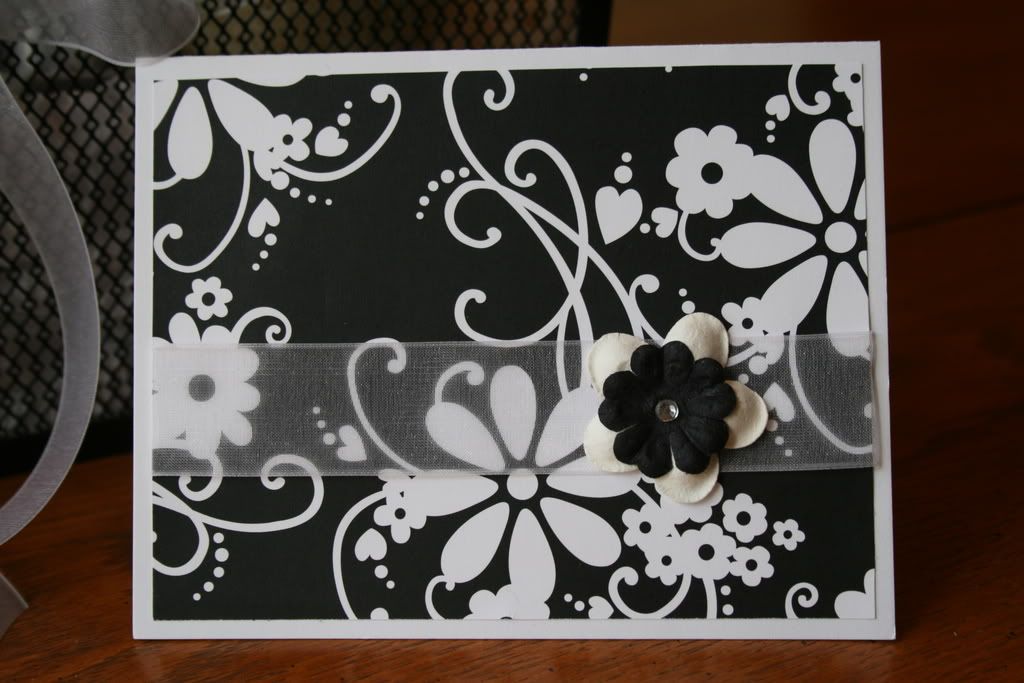
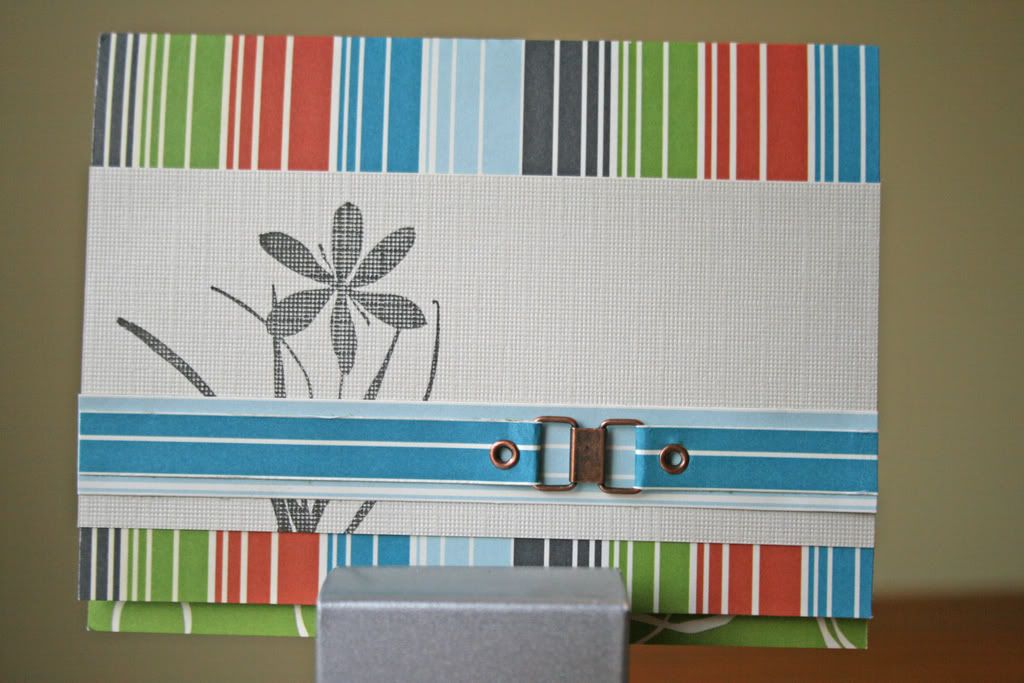 The last thing I made was this card. I used some of the leftover striped paper as the card base and for the strips. I dug a piece of cream cardstock out of my scrap drawer for the stamped image and for the interior.
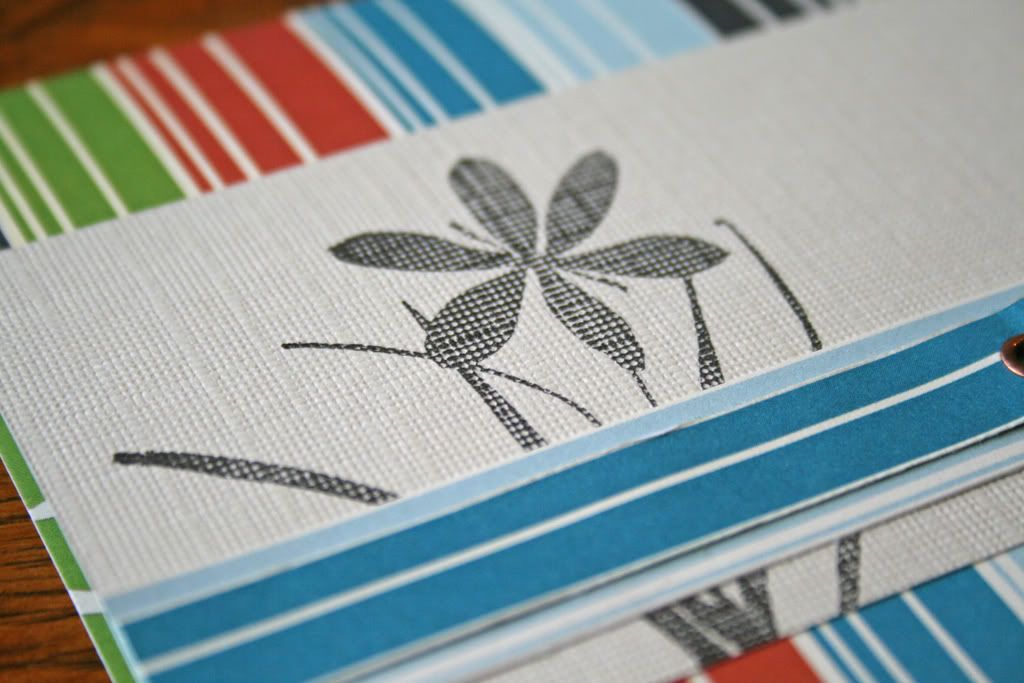 I love how the texture of the cardstock shows so well in the stamped image. It adds a little graphic edge to it, don't you think?
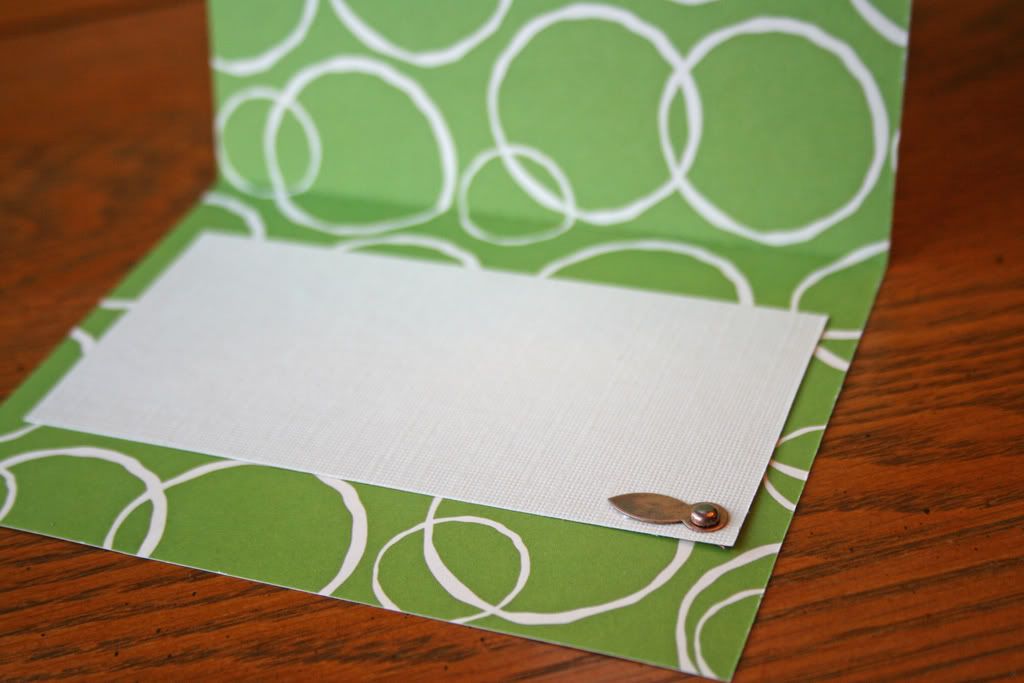 Just a little shot of the inside of the card. I love how the bottom of the interior peeks out from the bottom of the card.
This first layout is just a random Sunday night dinner at my mom's house. We go there about twice a month. I cut out the flowers from another sheet included in the kit and used them as a border for the strips of photos. I layered the flowers and used pop dots under some of them for additional dimention. I used the Heidi Swapp Today stamp that came with the kit as the title. I stamped it with Stampin' Up! Basic Black and then again with Versamark and then embossed with clear embossing powder mixed with black glitter. I wanted a little shimmer to go with the black Bazzill Bling cardstock. Then I used some of the leftover cut out flowers as centers for the Primas. The Prima's are layed out to draw your eye from the title through the layout to the journaling. (At least, that was the plan. LOL!) I'm so happy with the way "Time to Eat" turned out. It's so like a cartoon or a comic strip. It just makes me smile to see it. This little mini book uses the backing for the Heidi Swapp stamp as my cover. It's empty right now but the plan is to put my CKC-Portland pictures in it. The pretty colors will go so well with the rest of the Prima flowers. The last thing I made was this card. I used some of the leftover striped paper as the card base and for the strips. I dug a piece of cream cardstock out of my scrap drawer for the stamped image and for the interior. I love how the texture of the cardstock shows so well in the stamped image. It adds a little graphic edge to it, don't you think? Just a little shot of the inside of the card. I love how the bottom of the interior peeks out from the bottom of the card. I'll try to get my CKC-Portland pics up this week. I got some great pics of all the girls. I just want to thank each and every person there for being so great. The whole time I was there I felt better. Thank you! :D
Subscribe to:
Posts (Atom)